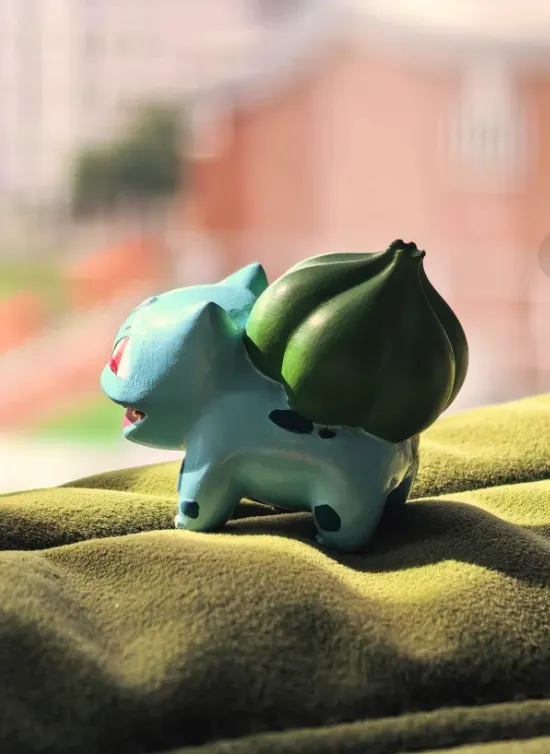
How to Paint 3D Printed Parts (PLA Step-by-Step Guide)
1. Can You Paint PLA Filament?
Quick Answer:Yes
PLA can be painted, but without proper surface preparation, the coating may fail to adhere or peel off easily.
This guide covers the essential steps for strong adhesion, including surface preparation, tool selection, and practical tips to avoid common mistakes—helping you achieve a professional and durable finish.
2. Why Is PLA Hard to Paint?
PLA has a naturally smooth surface with low surface energy, making it difficult for paint to properly adhere.
The lack of surface roughness prevents effective mechanical bonding, which can lead to peeling or chipping over time. In addition, PLA is relatively inert, meaning it does not chemically bond well with most coatings.
For this reason, surface preparation (sanding + priming) is not optional—it is essential for successful painting.
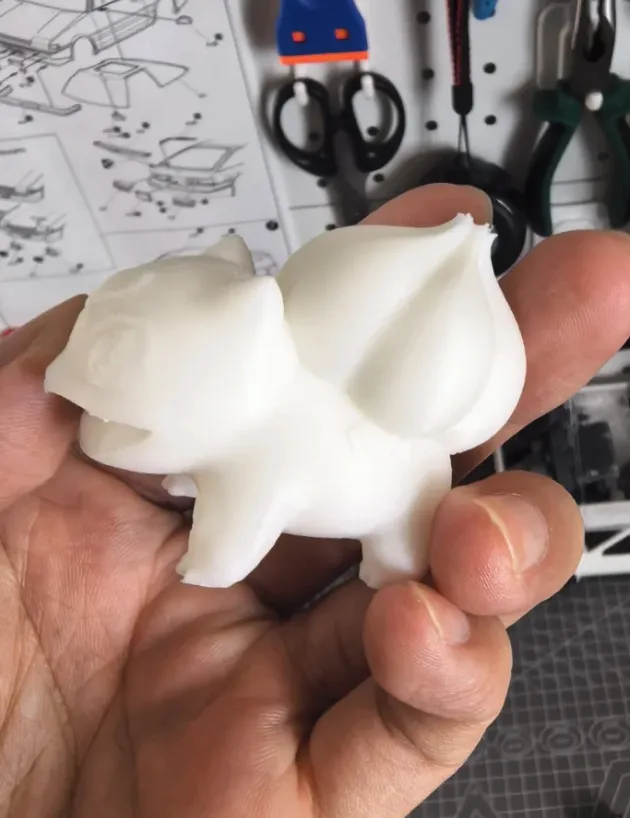
3.Full Preparation Workflow
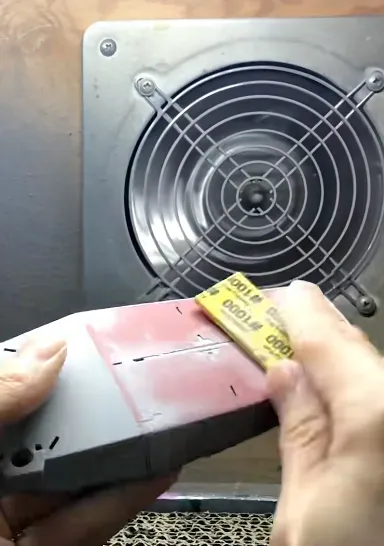
Sanding
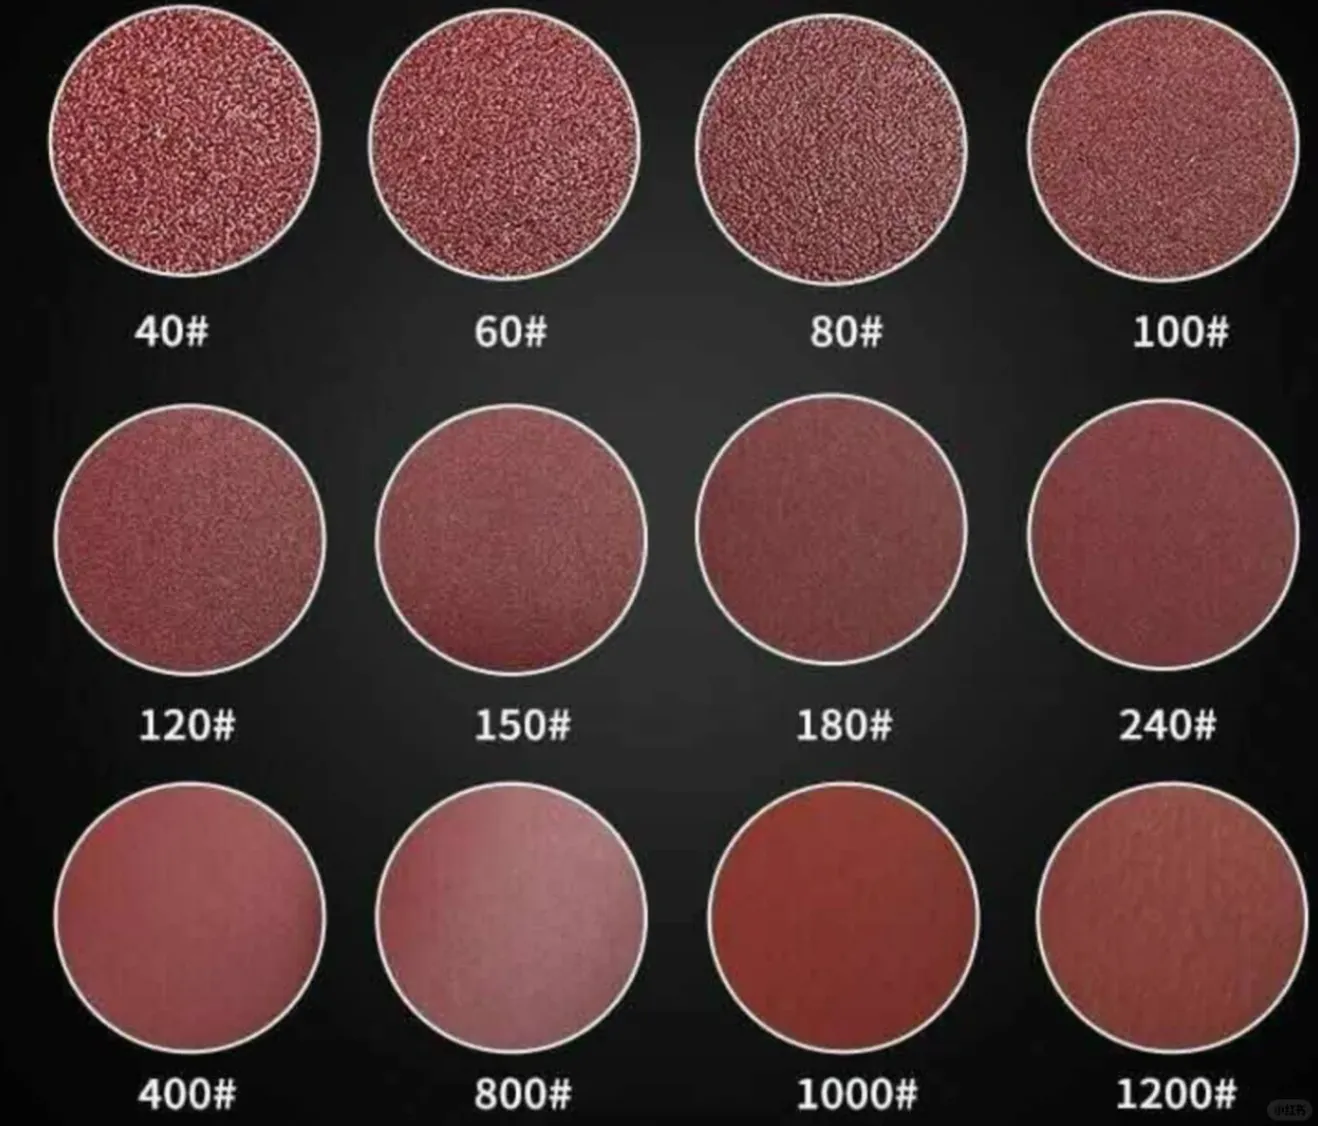
Sanding is the first and most critical step in preparing PLA for painting. It removes visible layer lines and surface imperfections while creating a slightly rough texture that allows paint to bond more effectively.
The process should always follow a progression from coarse to medium to fine grits. Start with lower grit sandpaper to eliminate major layer lines, then gradually move to finer grits to refine the surface and avoid deep scratches. Skipping steps often leads to uneven finishes that become more visible after painting
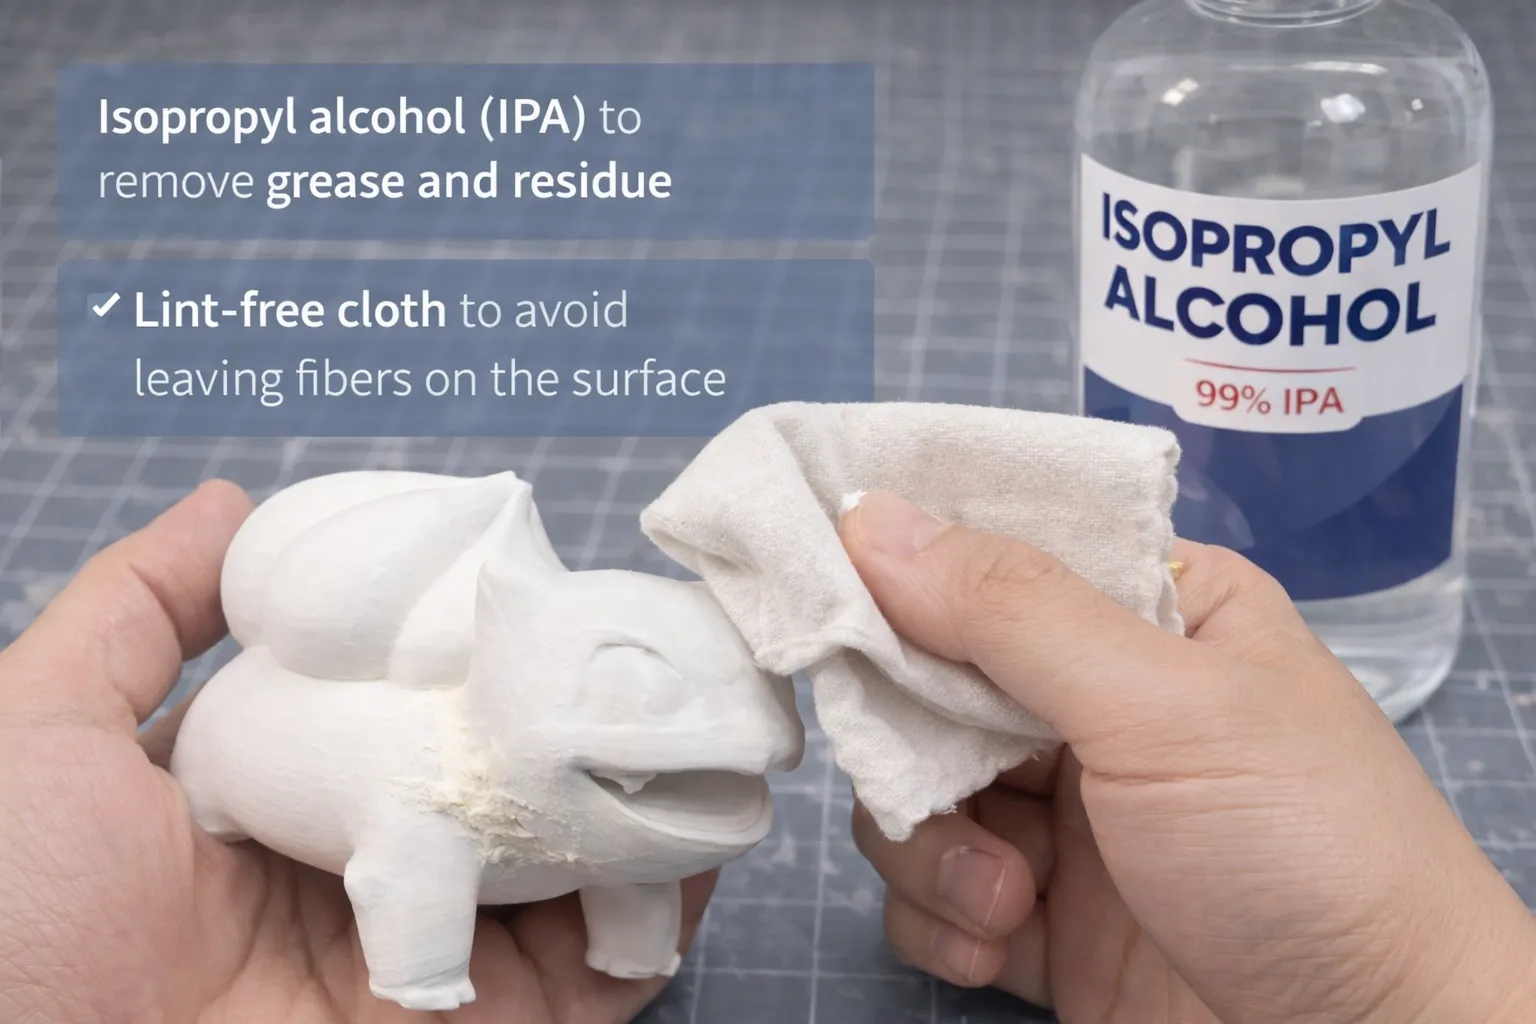
Cleaning
Cleaning removes dust, debris, and surface oils that can prevent paint from properly adhering. Even after sanding, leftover particles can sit on the surface and weaken the bond between the paint and the material.
Wipe the print thoroughly using a lint-free cloth and isopropyl alcohol (IPA) to ensure a clean, grease-free surface. IPA is commonly used in 3D printing because it effectively removes residue without damaging PLA
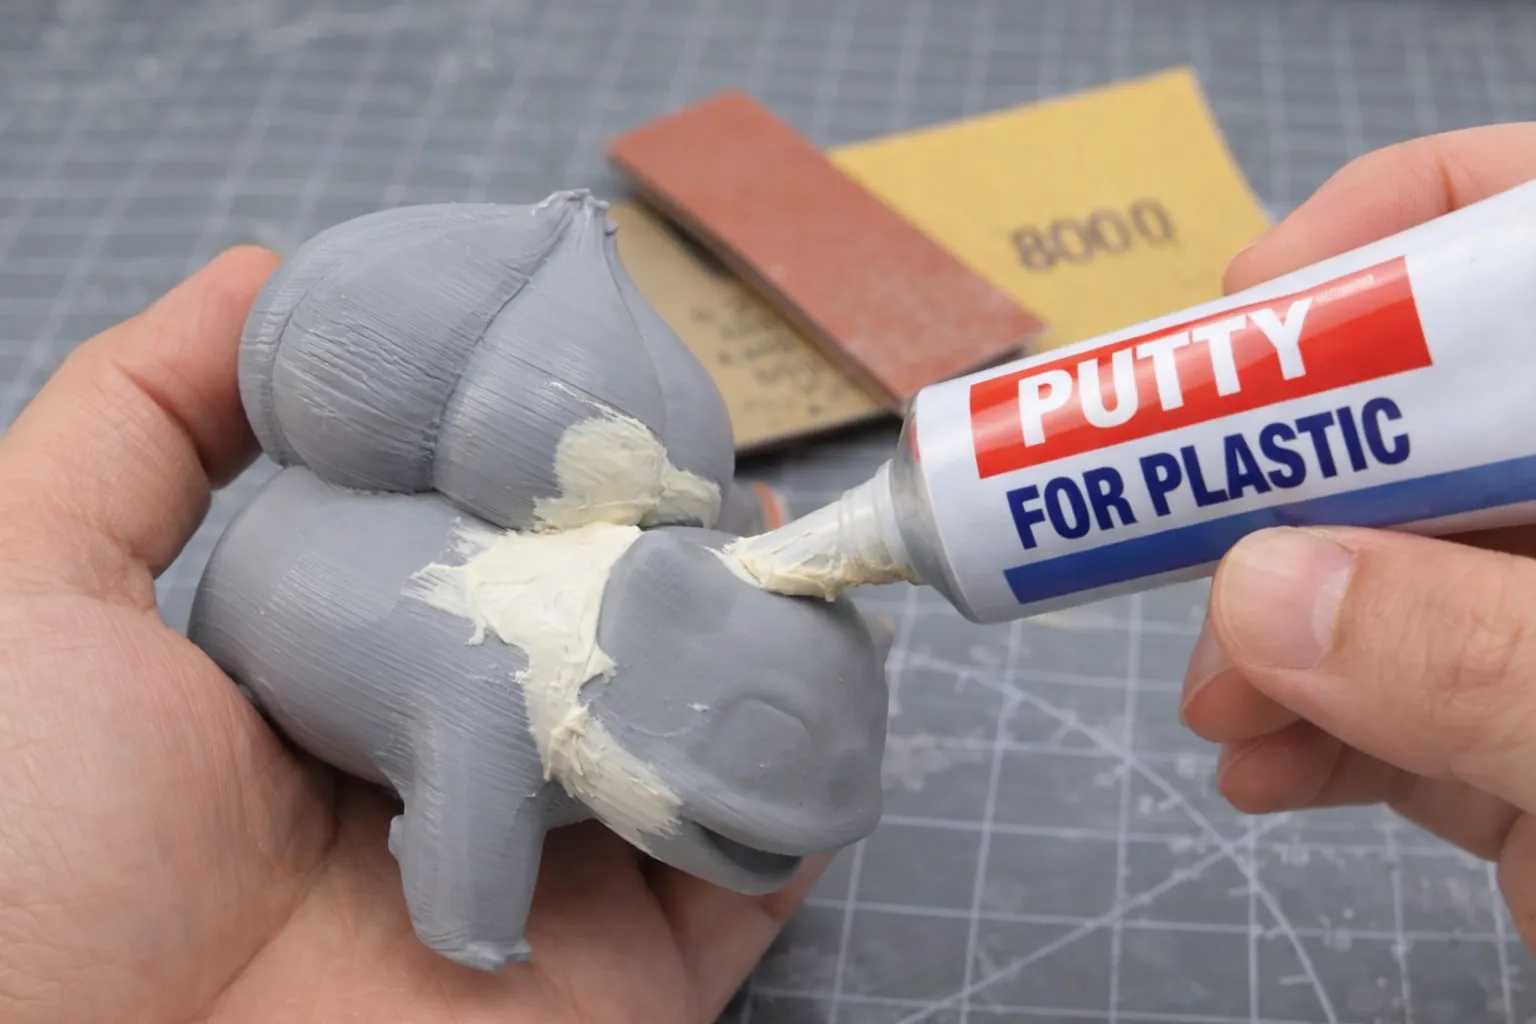
Filling
Applying filler or putty helps eliminate visible layer lines, gaps, and minor surface defects that sanding alone cannot fully remove. It creates a smoother, more uniform surface, which is critical for achieving a professional paint finish.
After application, the filler hardens and can be sanded down to match the surrounding surface, effectively leveling the print and preparing it for primer. This step is especially useful for large prints or parts with noticeable imperfections.
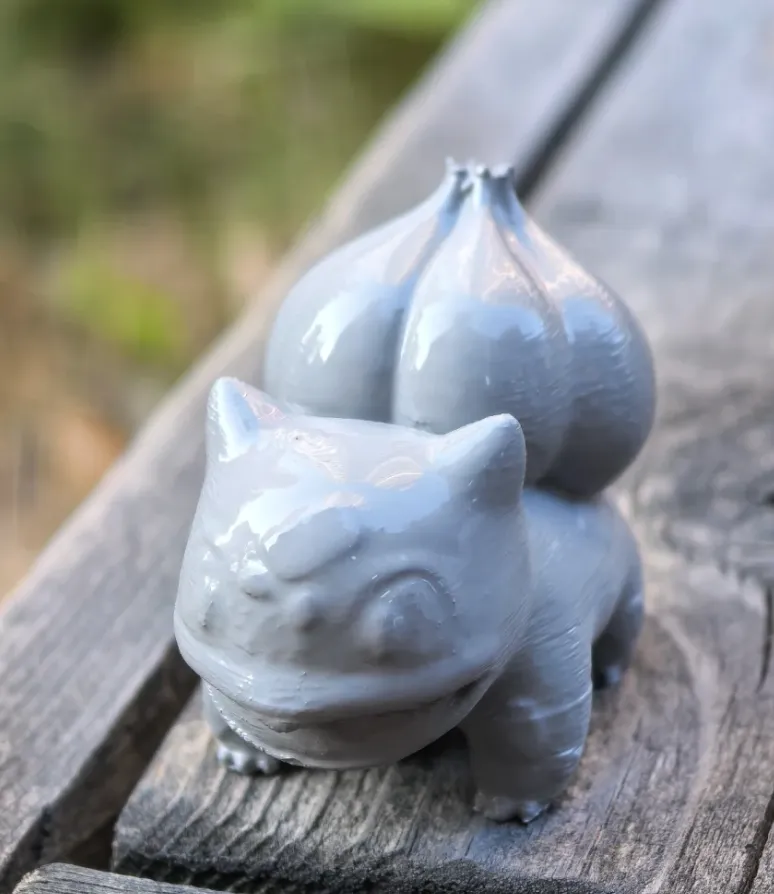
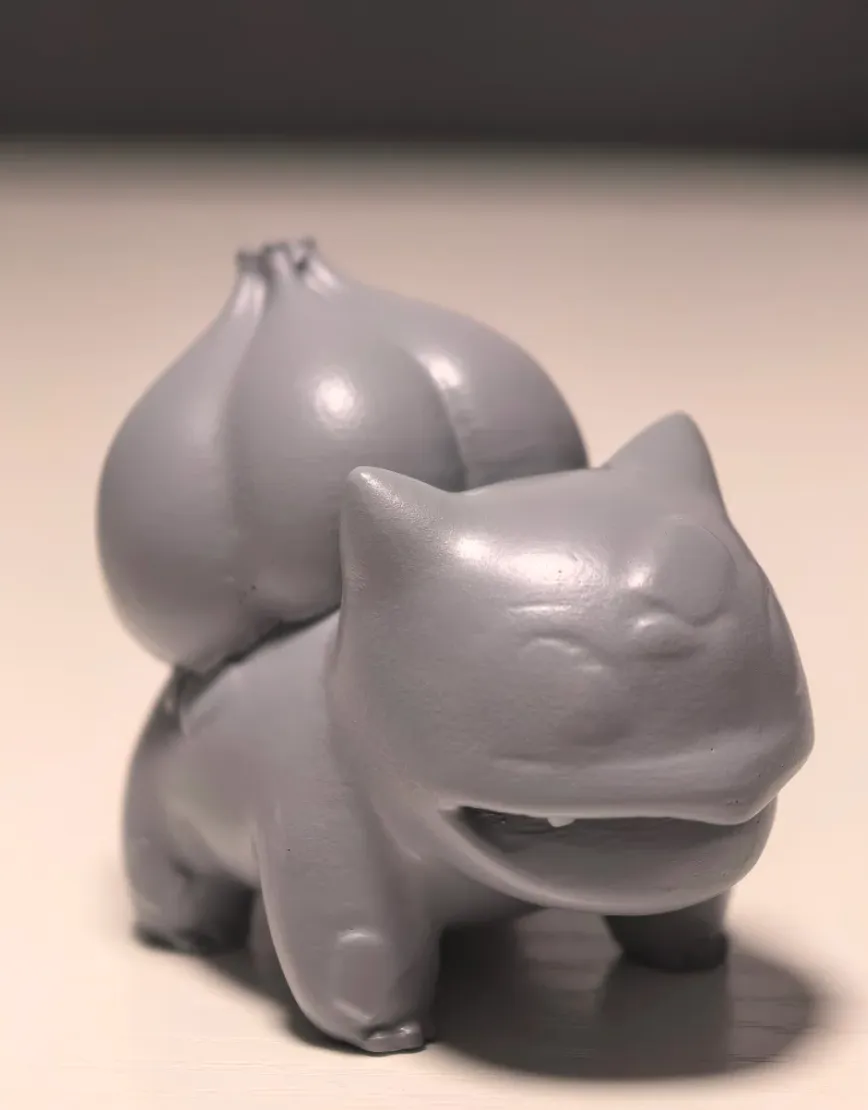
Priming
Priming is the step that determines whether your paint will last or fail. It acts as a bonding layer between the PLA surface and the paint, significantly improving adhesion and preventing peeling. At the same time, primer helps smooth out remaining micro-imperfections and creates a uniform base for consistent color application. 
Without primer, even well-sanded PLA surfaces can struggle to hold paint reliably.
Painting
4. Recommended Tools & Materials
Using the right tools and materials is just as important as the painting process itself.
Each stage—from surface preparation to final finishing—requires specific tools to ensure proper adhesion, smooth coverage, and long-term durability.
Surface Preparation Tools
- Sandpaper (120–800+ grit) for removing layer lines and refining the surface
- Sanding sponge for more even pressure and curved surfaces
Cleaning Tools
- Isopropyl alcohol (IPA) to remove grease and residue
- Lint-free cloth to avoid leaving fibers on the surface
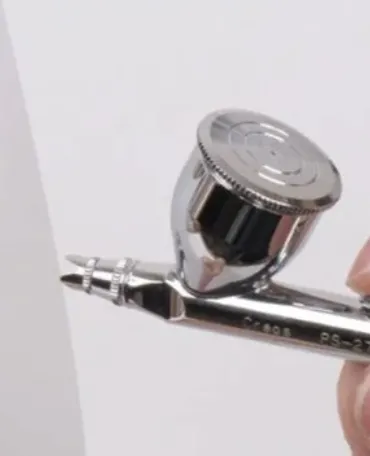
Painting Tools
- Spray paint (recommended) for smooth, even coverage across large areas
- Airbrush (advanced) for professional finishes, gradients, and fine control
- Brushes for detailed work and small areas
Paint Types
- Acrylic paint (recommended) – easy to use, fast-drying, strong adhesion. Acrylic markers are essentially acrylic paint in pen form—ideal for detail work, but not for full-surface coverage.
- Spray paint – consistent and efficient for full coverage
- Enamel paint – more durable but slower drying
- Oil paint – not recommended without primer due to weak adhesion
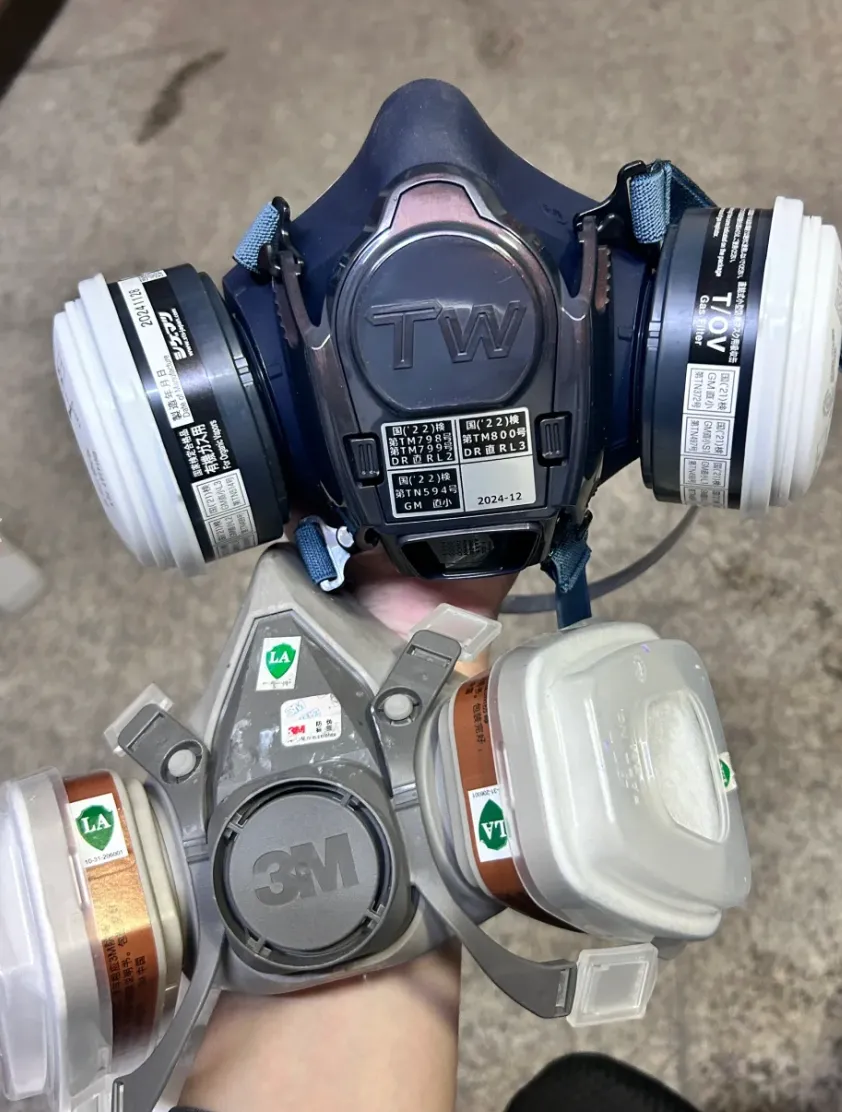
Safety Equipment
- Mask / respirator to avoid inhaling fumes
- Gloves to protect skin
- Ventilation to ensure safe working conditions
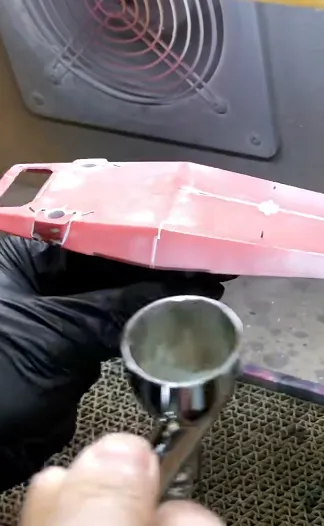
5. Choose Proper Painting Method
Spray Painting (Recommended)
- Provides smooth, even coverage across the entire surface
- Ideal for large areas and consistent finishes
- Delivers a more professional, factory-like result
Brush Painting
- Offers precise control for small areas and fine details
- Ideal for touch-ups, edges, and intricate features
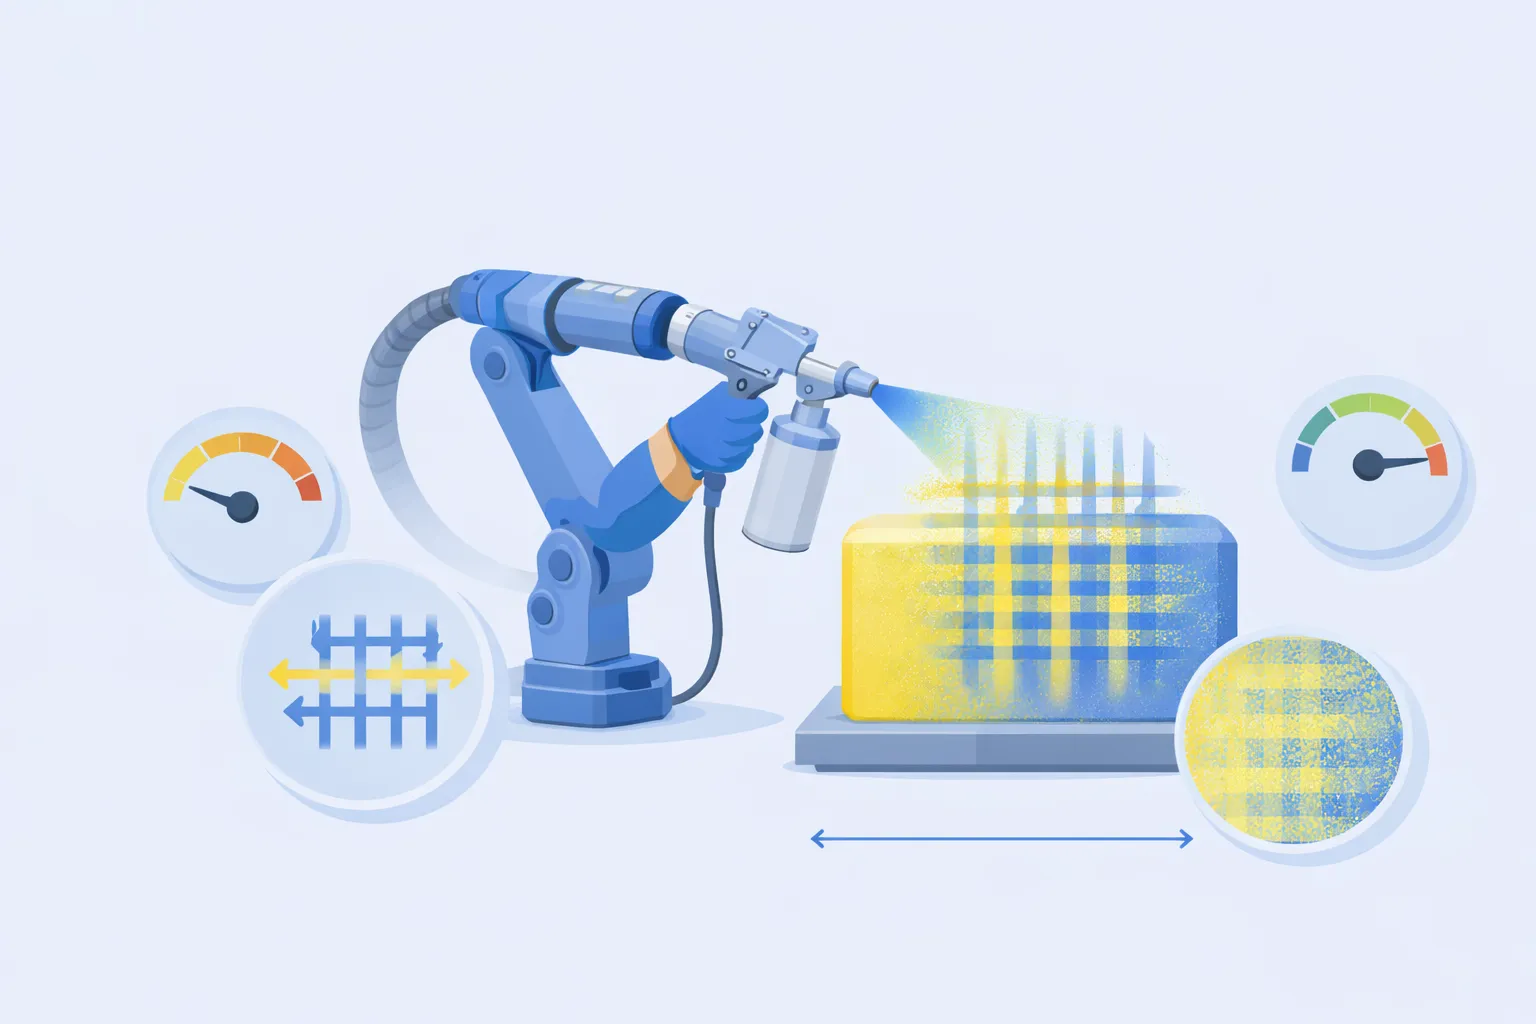
6. Spray Painting Tips
Good spray technique is what separates a clean, professional finish from a rough, uneven one. Control, consistency, and patience are key.
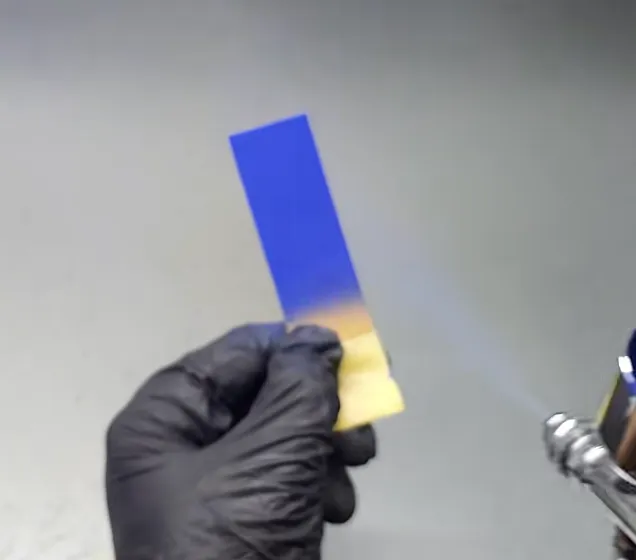
Maintain proper distance (15–25 cm)
Too close can cause drips, while too far can result in a rough, grainy finish
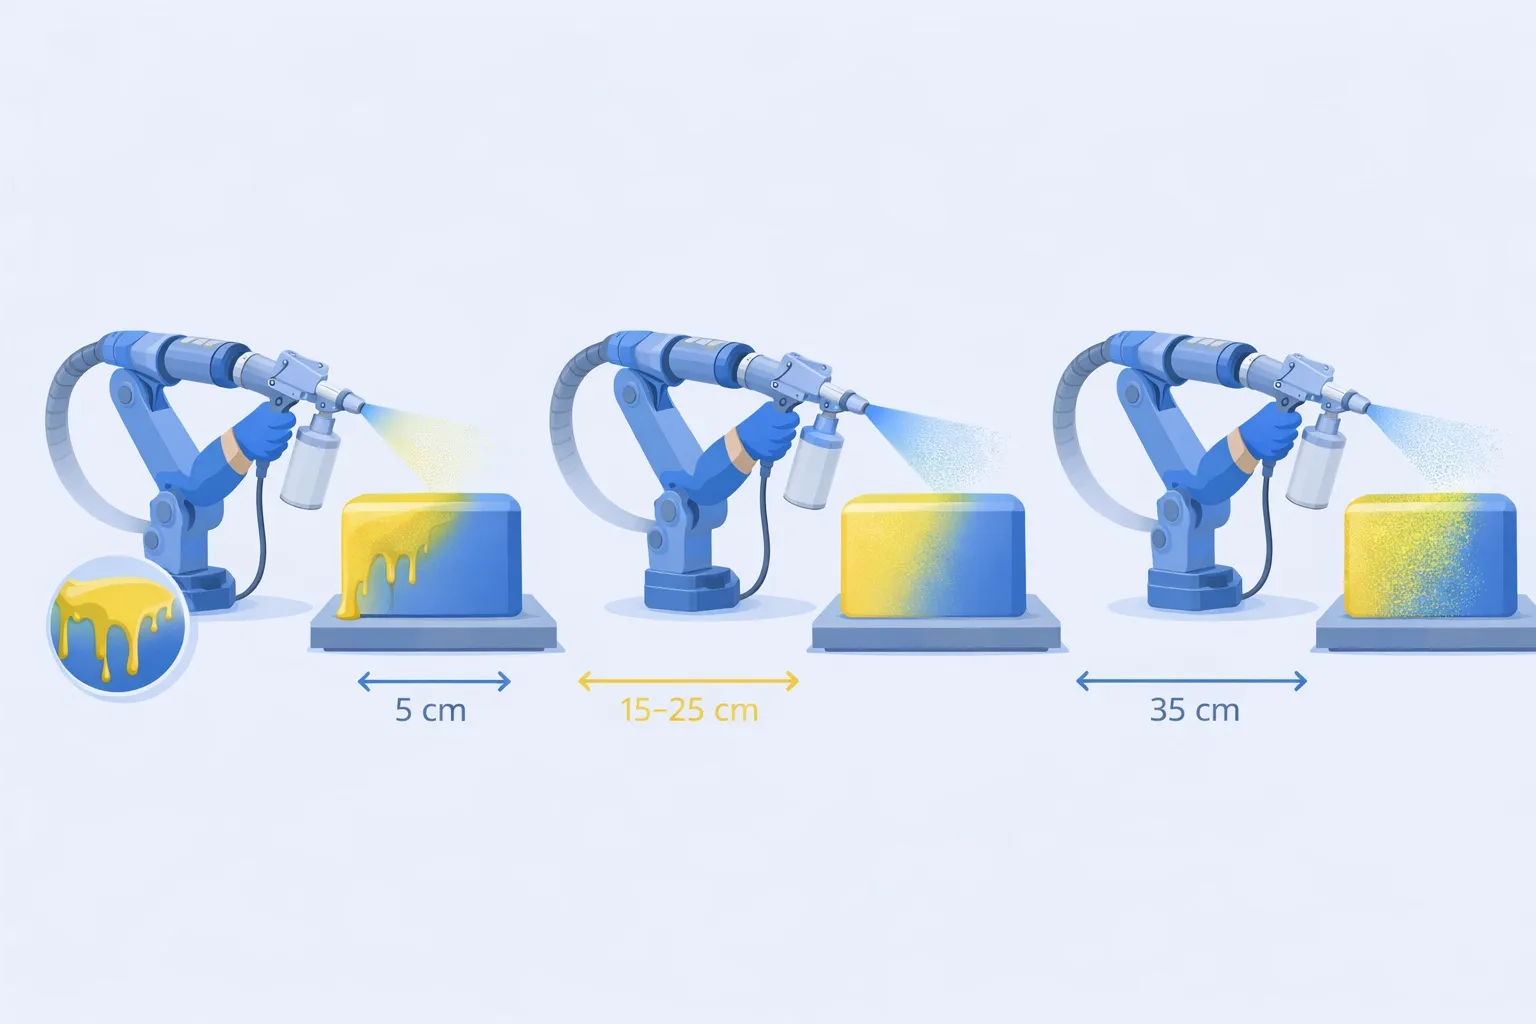
Keep a steady motion (don’t pause)
Move your hand at a consistent speed to avoid paint buildup in one area
Use cross passes (horizontal + vertical)
Apply paint in overlapping strokes (left-right, then up-down) for even coverage
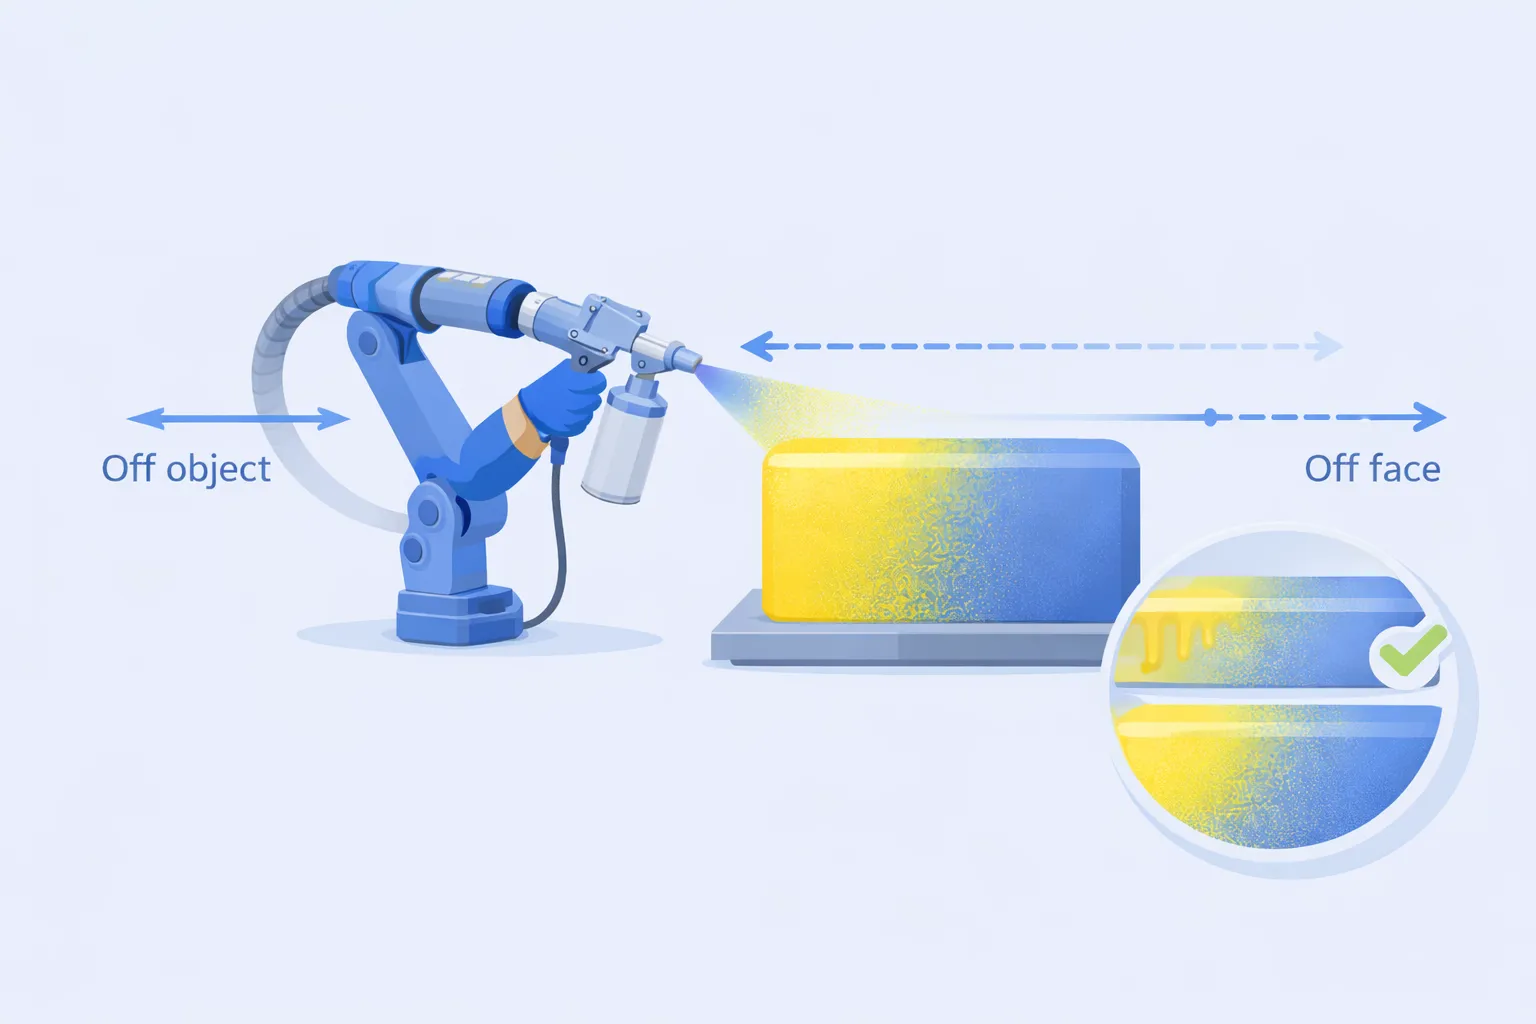
Start spraying off the object, then pass over it
Prevents paint buildup at the starting point
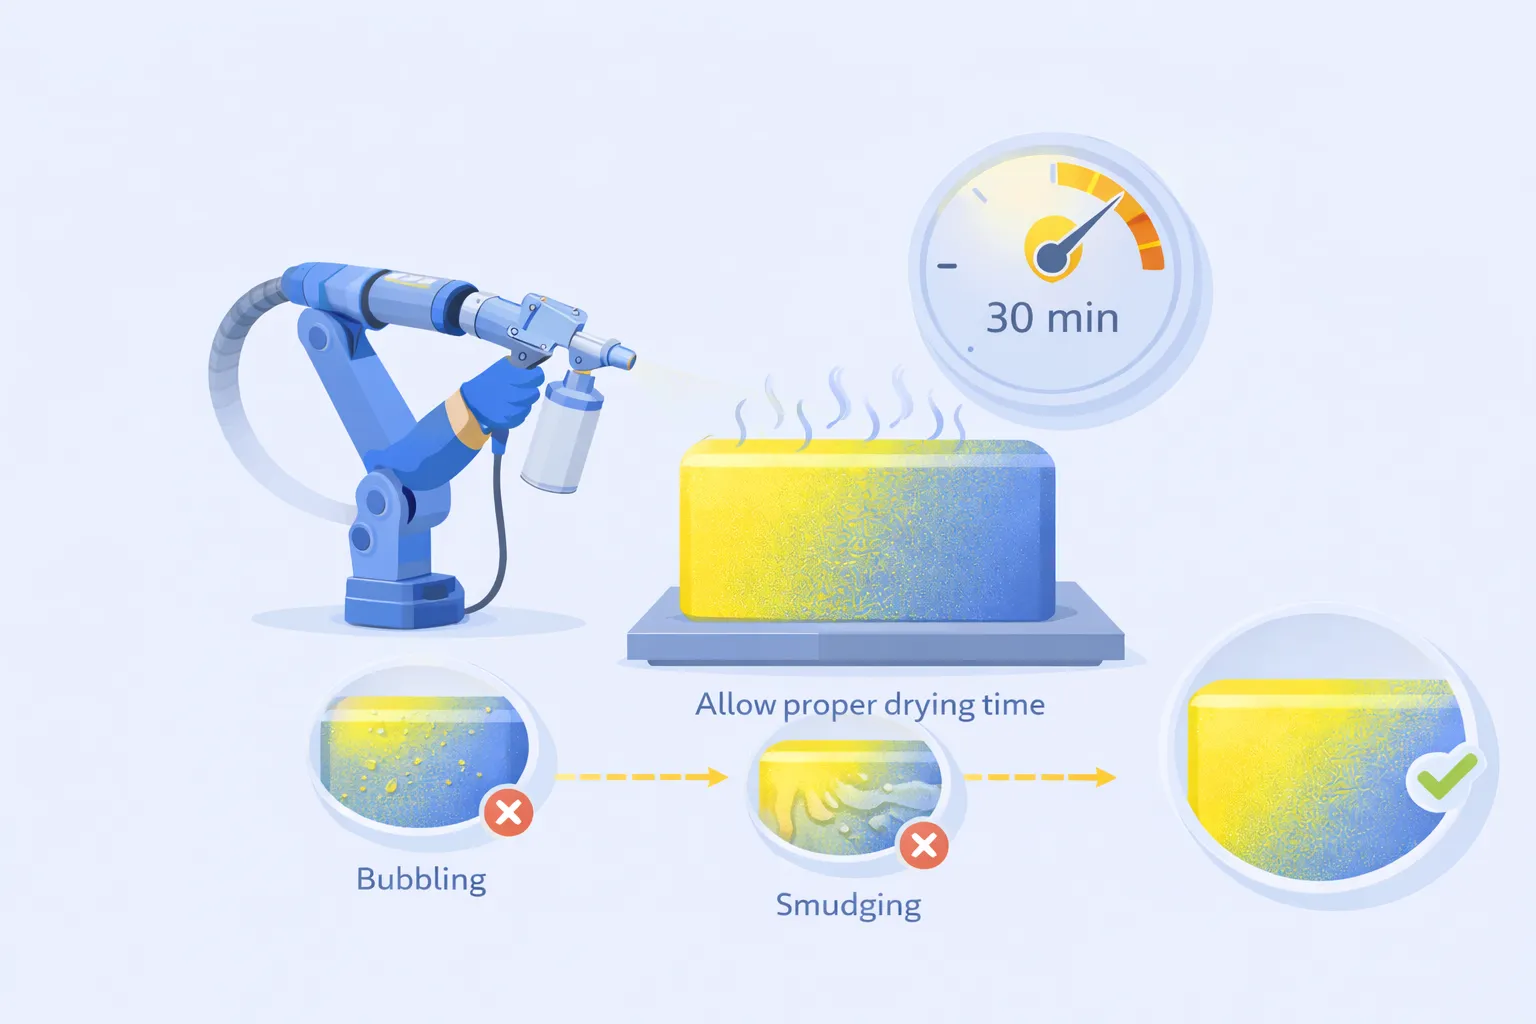
Apply multiple thin coats (core principle)
Build up color gradually with light layers
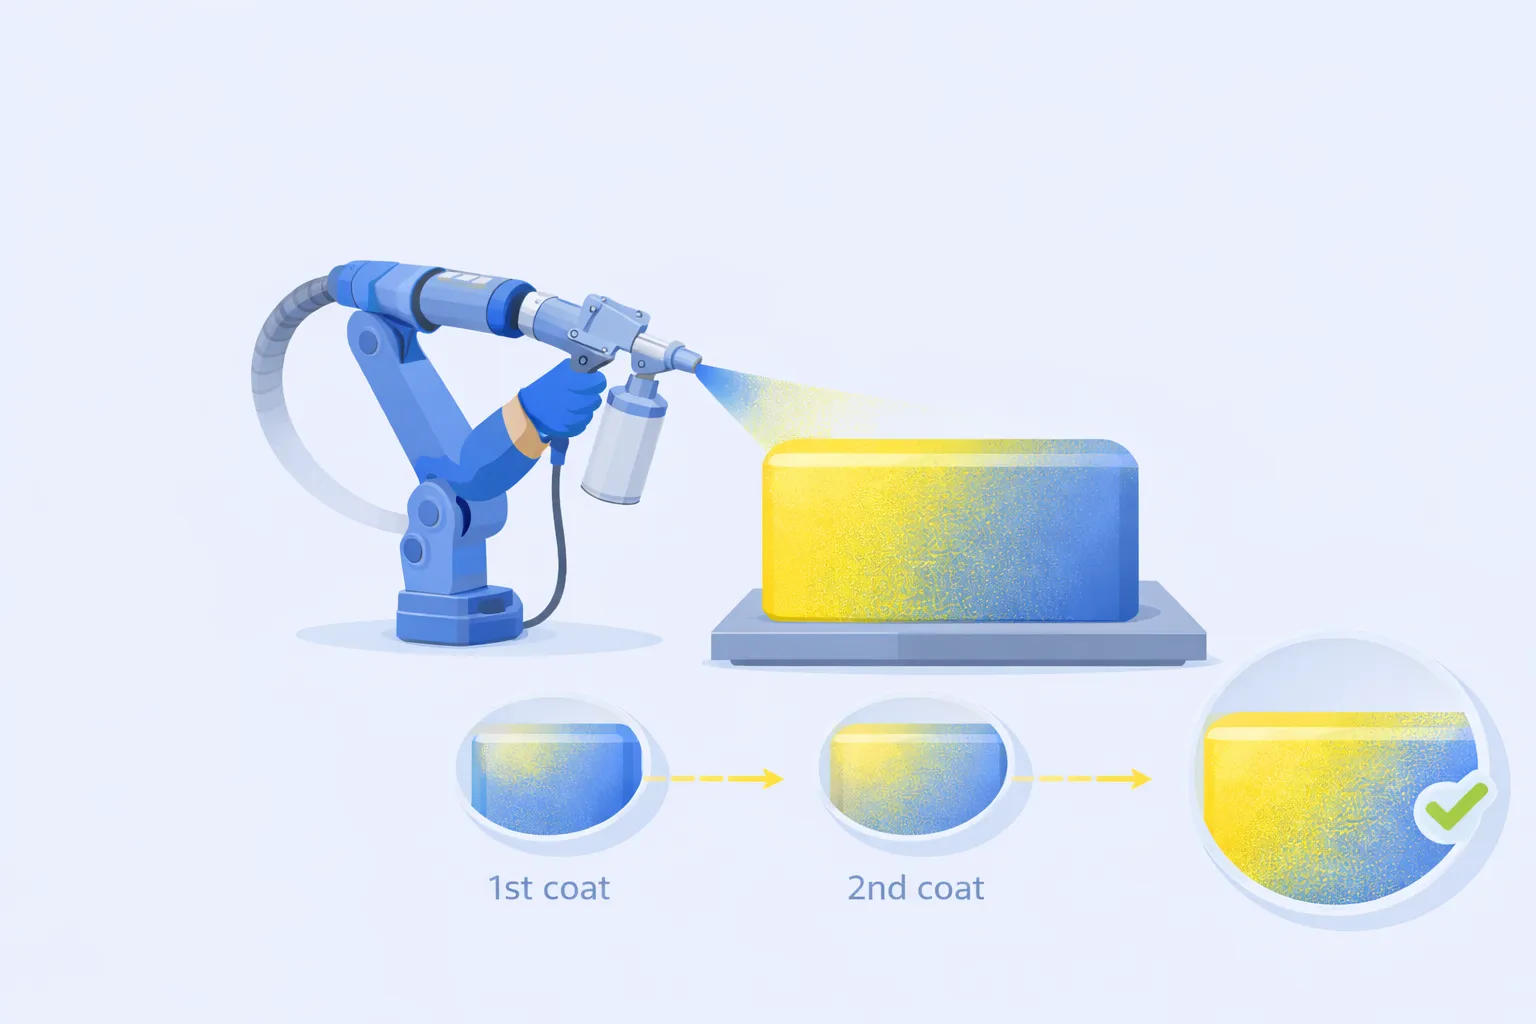
Allow proper drying between coats
Prevents bubbling, smudging, or adhesion issues
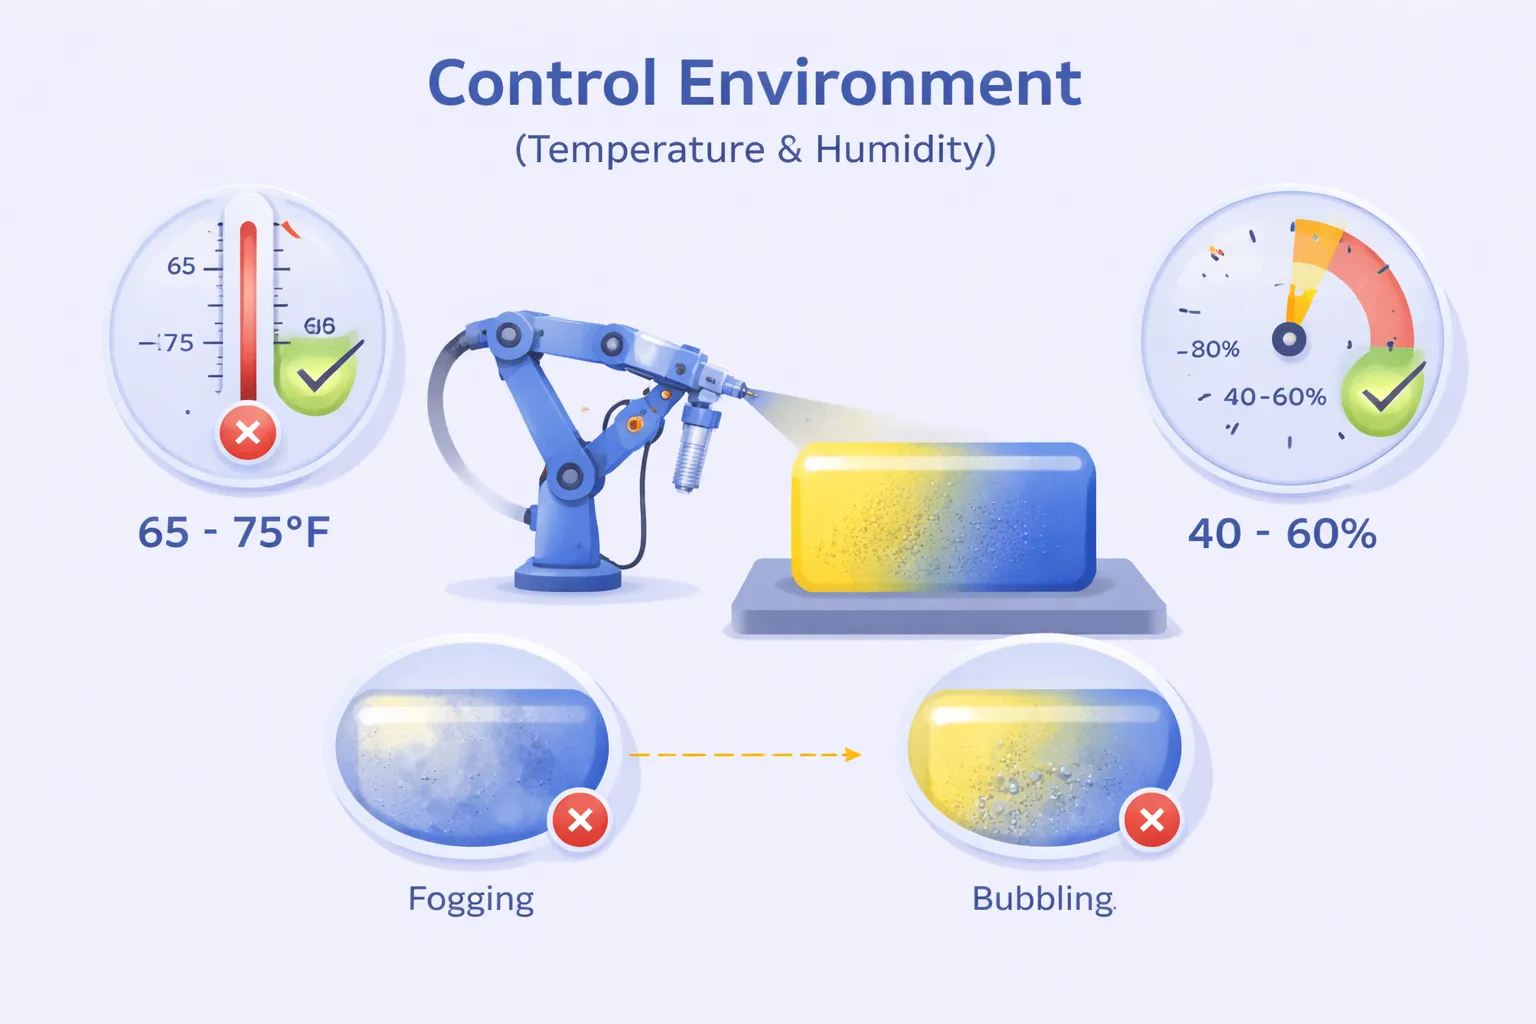
Control environment (temperature & humidity)
High humidity can cause fogging or bubbling
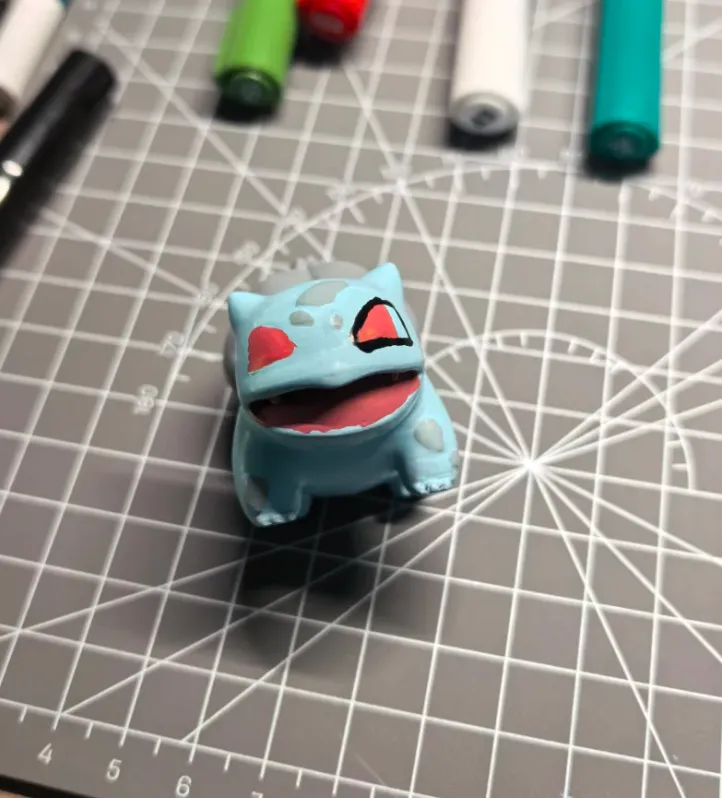
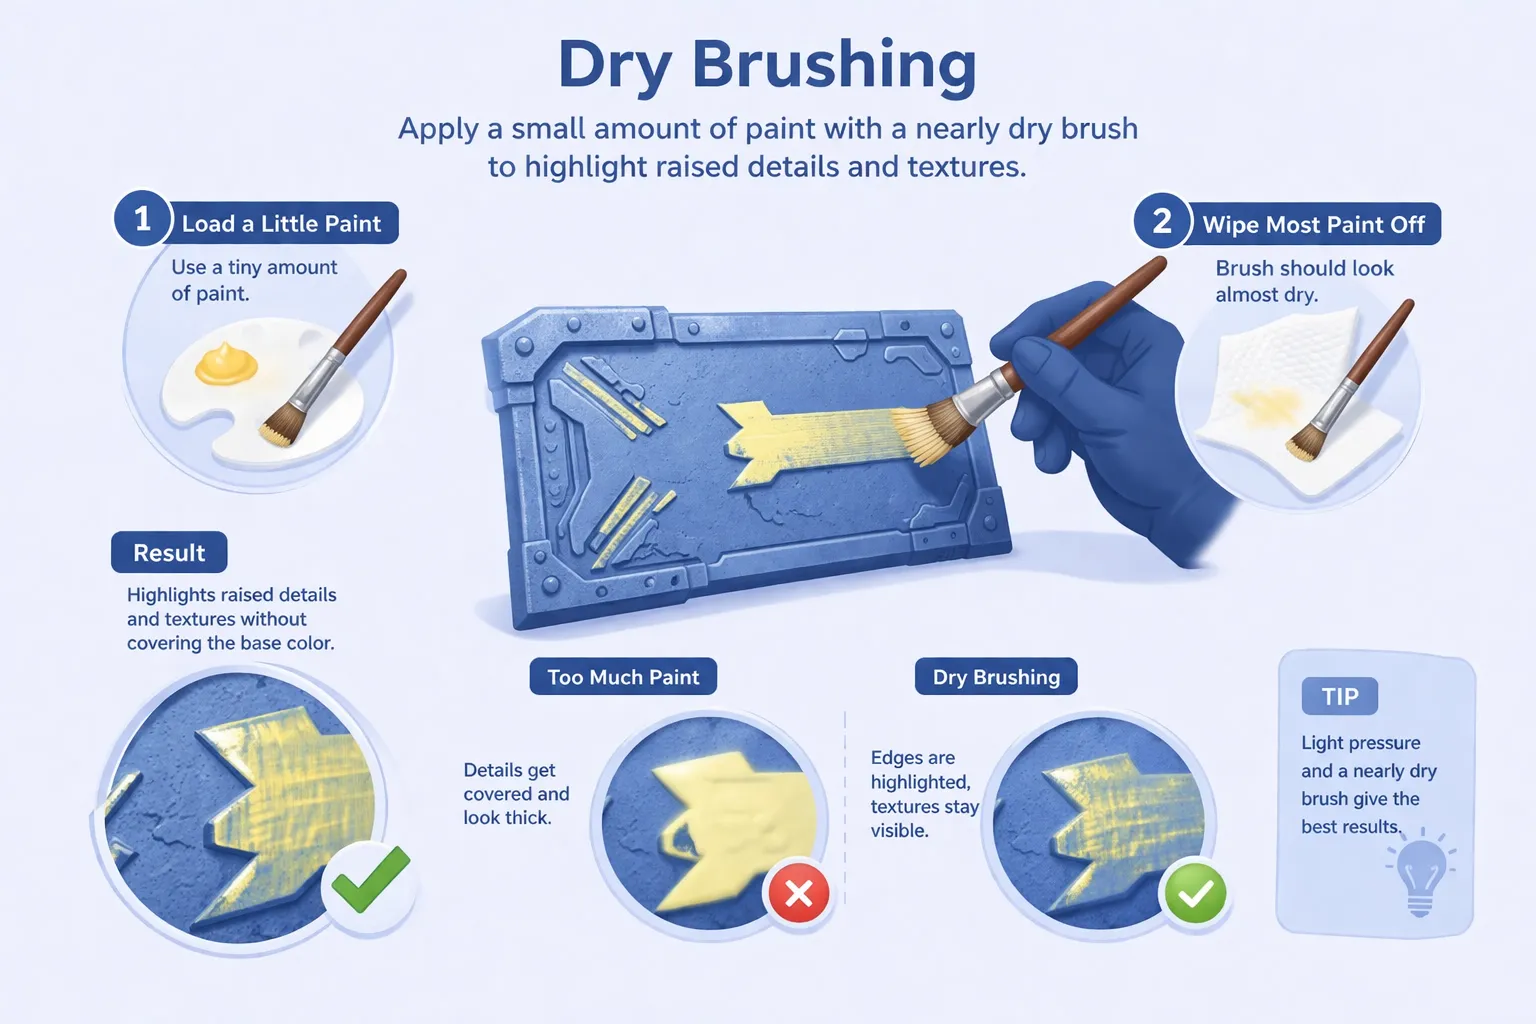
Dry Brushing
Apply a small amount of paint with a nearly dry brush to highlight raised details and textures. This technique enhances edges and surface features without covering the base color.
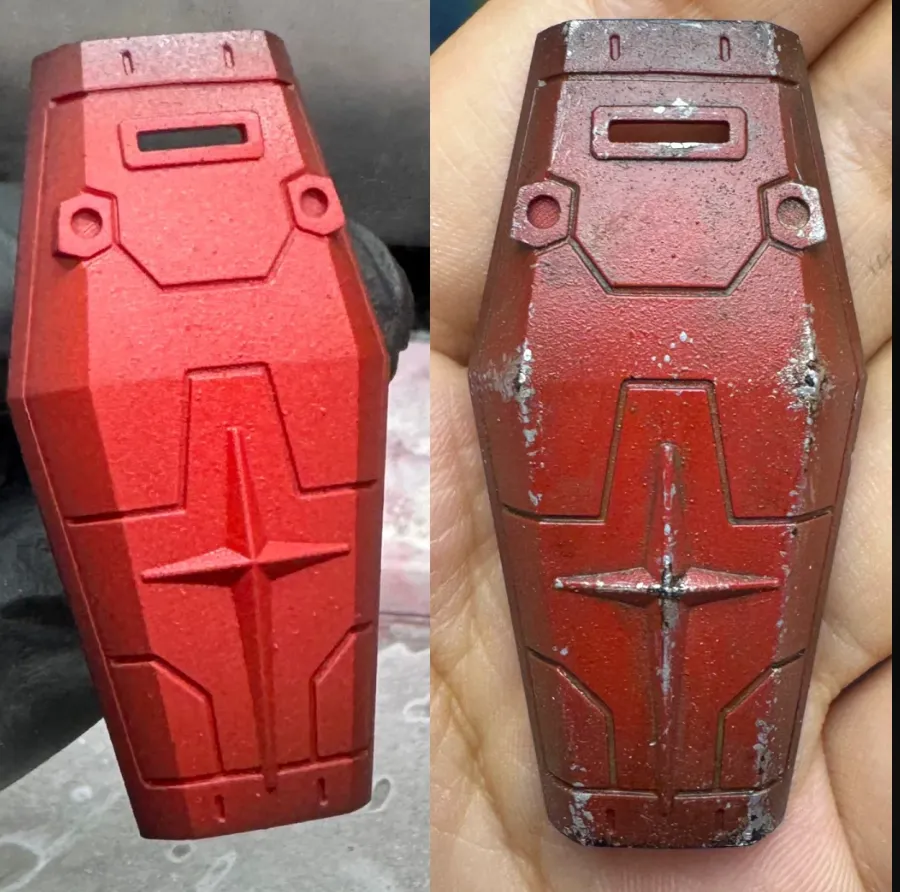
Weathering
Simulate wear, aging, or environmental effects such as dirt, rust, or fading. This adds realism and makes prints look less artificial and more like real-world objects.
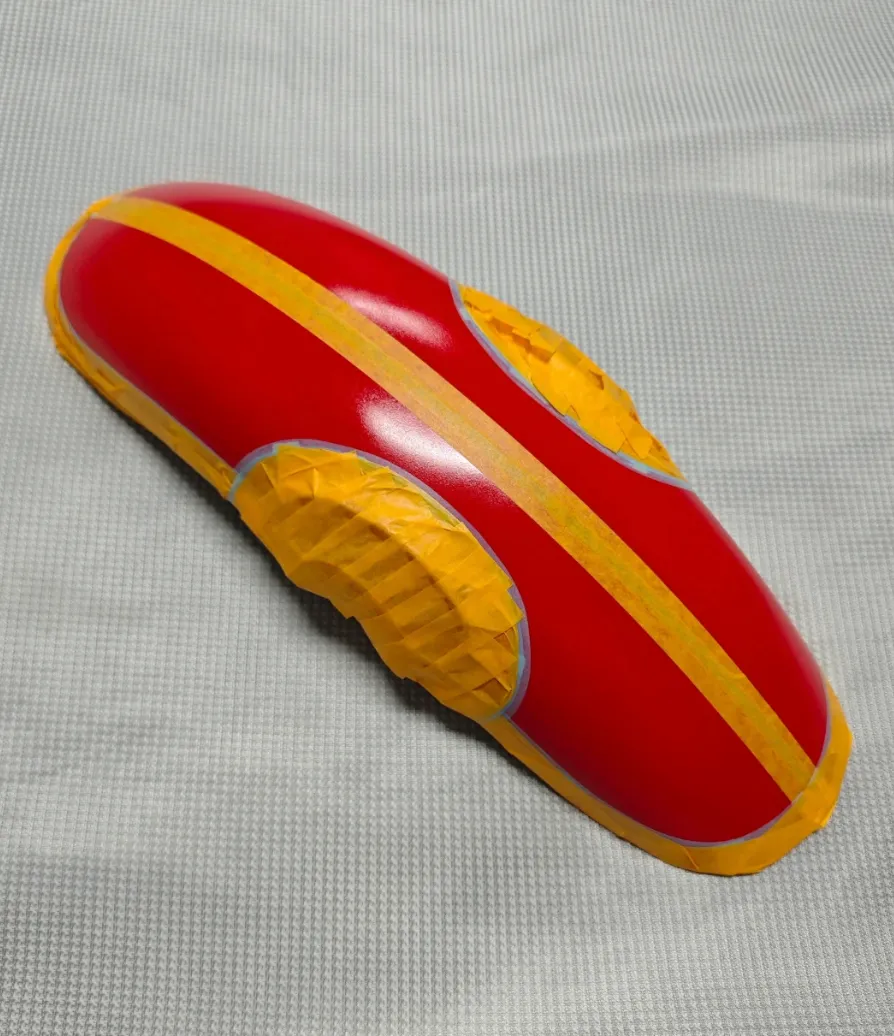
Masking
Use tape or stencils to block off specific areas, allowing for clean, sharp color separation when applying multiple colors. Ideal for patterns, logos, or precise color zones.
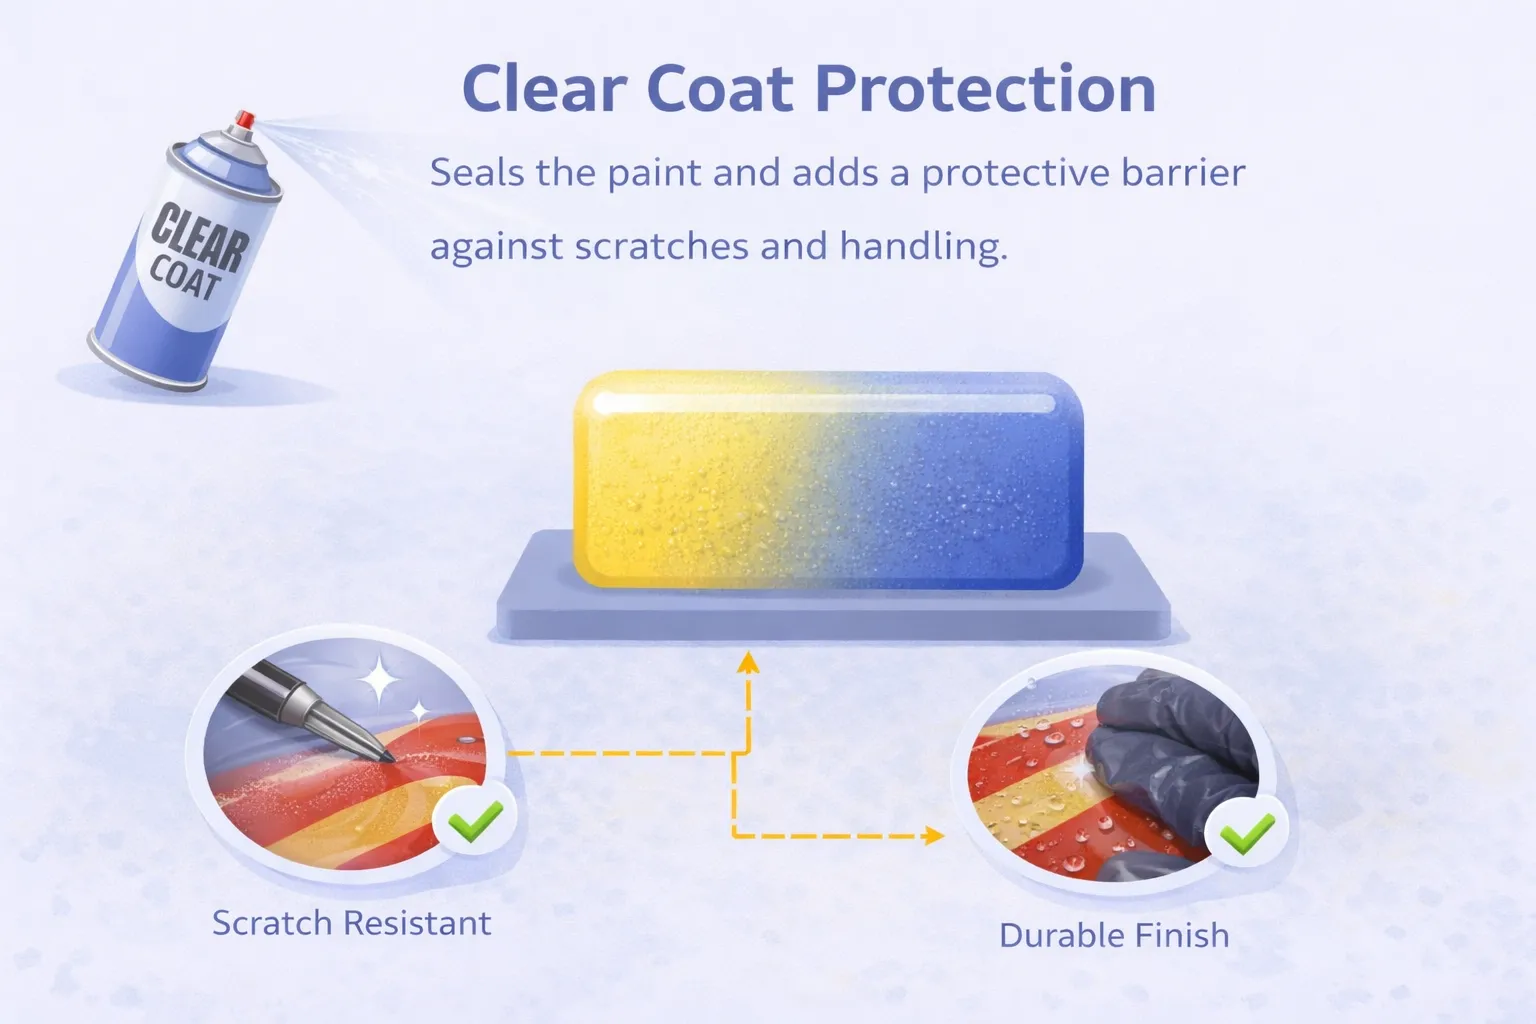
7. Finishing & Protection
The final step in painting PLA is applying a clear coat, which protects the surface and defines the overall look. Without this layer, even well-applied paint can wear down, scratch, or lose its finish over time.
Clear coat protection
Seals the paint and adds a protective barrier against scratches and handling
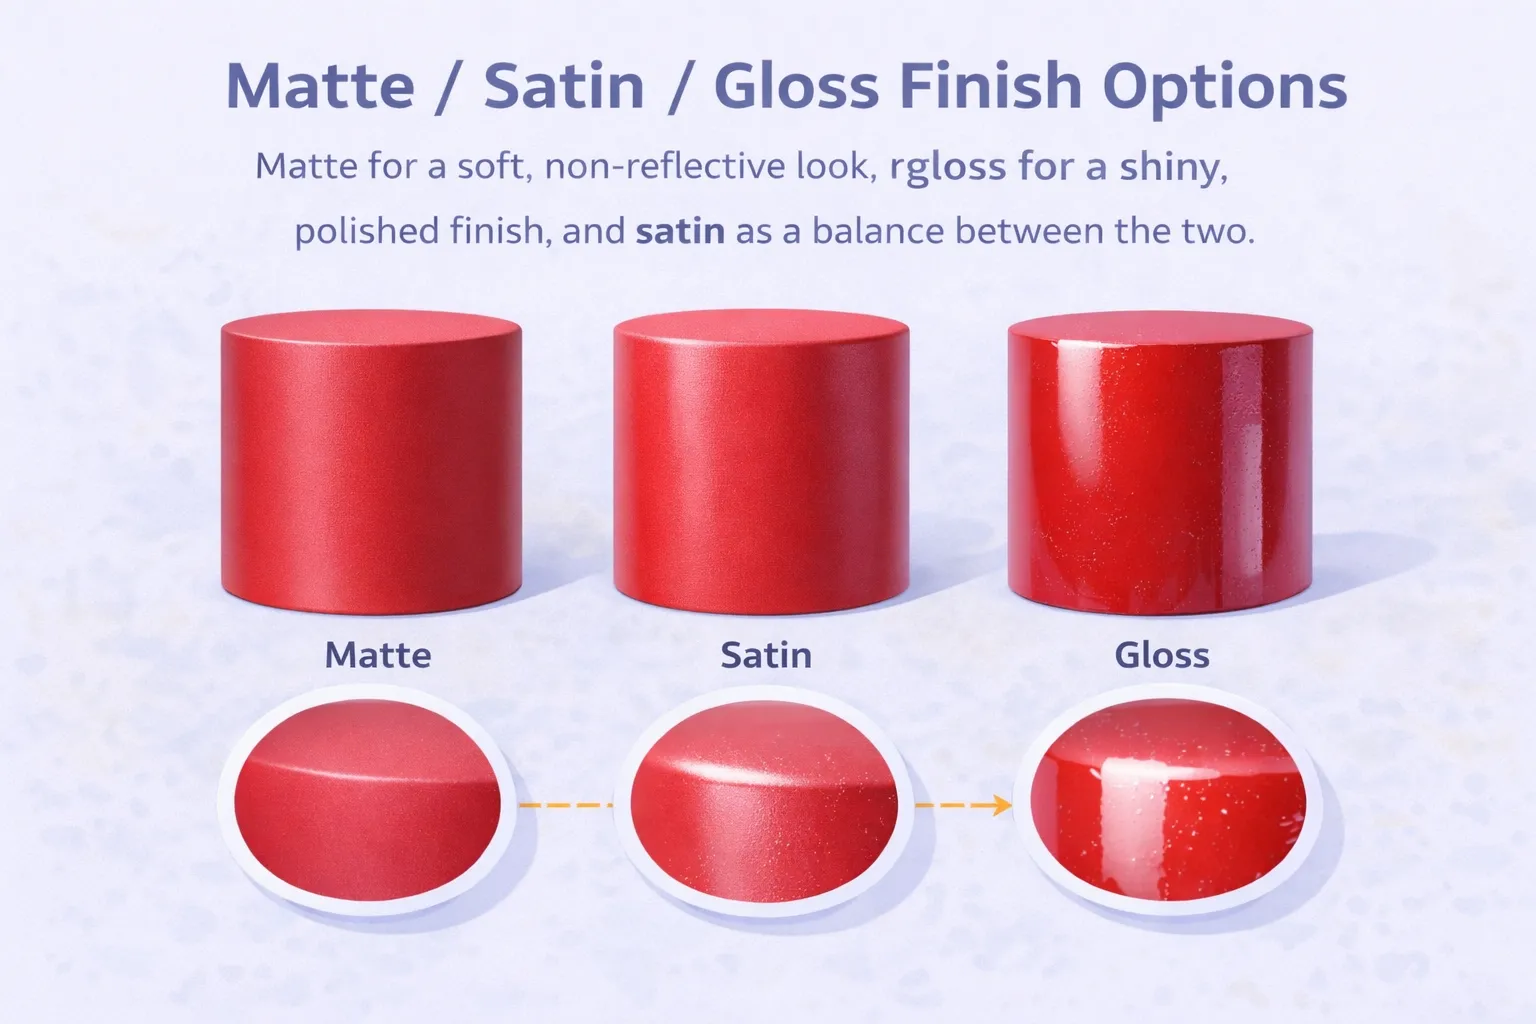
Matte / Satin / Gloss finish options
Matte for a soft, non-reflective look, gloss for a shiny, polished finish, and satin as a balance between the two
Improved durability
Enhances resistance to wear, making the painted part more suitable for long-term use
8. 3D Printing Materials Painting Difficulty Comparison
| Material | Painting Difficulty | Notes |
|---|---|---|
| PLA | ⭐ | Easiest to paint Smooth surface Good adhesion after light sanding |
| PLA+ | ⭐ | Similar to PLA Slightly better surface finish Beginner-friendly |
| ABS | ⭐⭐ | Good paint adhesion Can be acetone smoothed Improves final finish quality |
| PETG | ⭐⭐⭐ | Low surface energy Weaker paint adhesion Requires strong primer |
| ASA | ⭐⭐⭐ | Similar to ABS More resistant surface Needs sanding + primer |
| Polycarbonate (PC) | ⭐⭐⭐⭐ | Very smooth surface Chemically resistant Needs aggressive surface prep |
| Nylon (PA) | ⭐⭐⭐⭐⭐ | Very difficult to paint Absorbs moisture Poor coating adhesion |
| TPU | ⭐⭐⭐⭐ | Flexible surface Paint may crack or peel Requires flexible coatings |
| PVA | ⭐⭐⭐⭐⭐ | Water-soluble material Not suitable for painting Poor durability |
Conclusion
Achieving a high-quality finish on 3D printed parts is not about a single step, but a controlled, sequential process.
From initial sanding to the final clear coat, each stage plays a specific role in building a smooth, durable, and visually consistent surface.
Sanding prepares the foundation by removing layer lines, while proper cleaning ensures strong adhesion.
Filling can further refine the surface by eliminating imperfections.
Priming then creates a uniform base, and adequate drying time is essential before moving forward.
Applying paint in thin, controlled layers allows color to build gradually without defects, and drying between coats prevents uneven finishes.
Finally, a clear coat seals the surface, enhancing durability and protecting the final appearance.
When each step is executed with patience and consistency, even standard 3D prints can achieve a professional-grade finish.
Additional Questions You Might Have (FAQ)
Can You Paint PLA Without Primer?
It is not recommended to paint PLA without primer, because the paint will have very weak adhesion and can easily peel or scratch off. A primer creates a proper bonding layer that significantly improves durability.
Why Doesn’t Paint Stick to PLA?
Paint does not stick well to PLA because the material has a smooth and low-adhesion surface. Without proper sanding and primer, the coating cannot bond effectively and will eventually fail.
Why Does Oil Paint Perform Poorly on PLA?
Oil paint performs poorly on PLA because it dries slowly and does not adhere well to the surface. As a result, it is more likely to smudge, peel, or wear off, especially when no primer is used.
Can You Skip Sanding?
You should not skip sanding, as it removes layer lines and improves surface adhesion. Without this step, the finish will appear rough and the paint will not bond properly.
How Many Coats of Paint Are Needed?
Typically, 2 to 5 thin coats of paint are recommended, because multiple light layers provide better coverage and durability than a single thick application.
Why Is My Paint Peeling or Not Sticking?
Paint peeling or failing to stick is usually caused by insufficient surface preparation, such as skipping primer or not sanding properly. Improving these steps will significantly enhance adhesion.
Why Is the Surface Rough After Painting?
A rough surface after painting is often the result of inadequate sanding or unfilled surface defects. Using finer grit sandpaper and applying filler can help achieve a smoother finish.
Why Is My Paint Uneven?
Uneven paint is typically caused by inconsistent spray movement or varying distance from the surface during application. Maintaining a steady motion and consistent distance will produce a more uniform result.
Why Are There Bubbles in the Paint?
Bubbles in the paint can form due to high humidity or insufficient drying time between coats. Controlling the environment and allowing proper drying will help prevent this issue.
Why Is the Paint Dripping?
Paint dripping usually occurs when the paint is applied too thickly or sprayed too close to the surface. Applying thinner coats and keeping an appropriate distance will reduce the risk of drips.
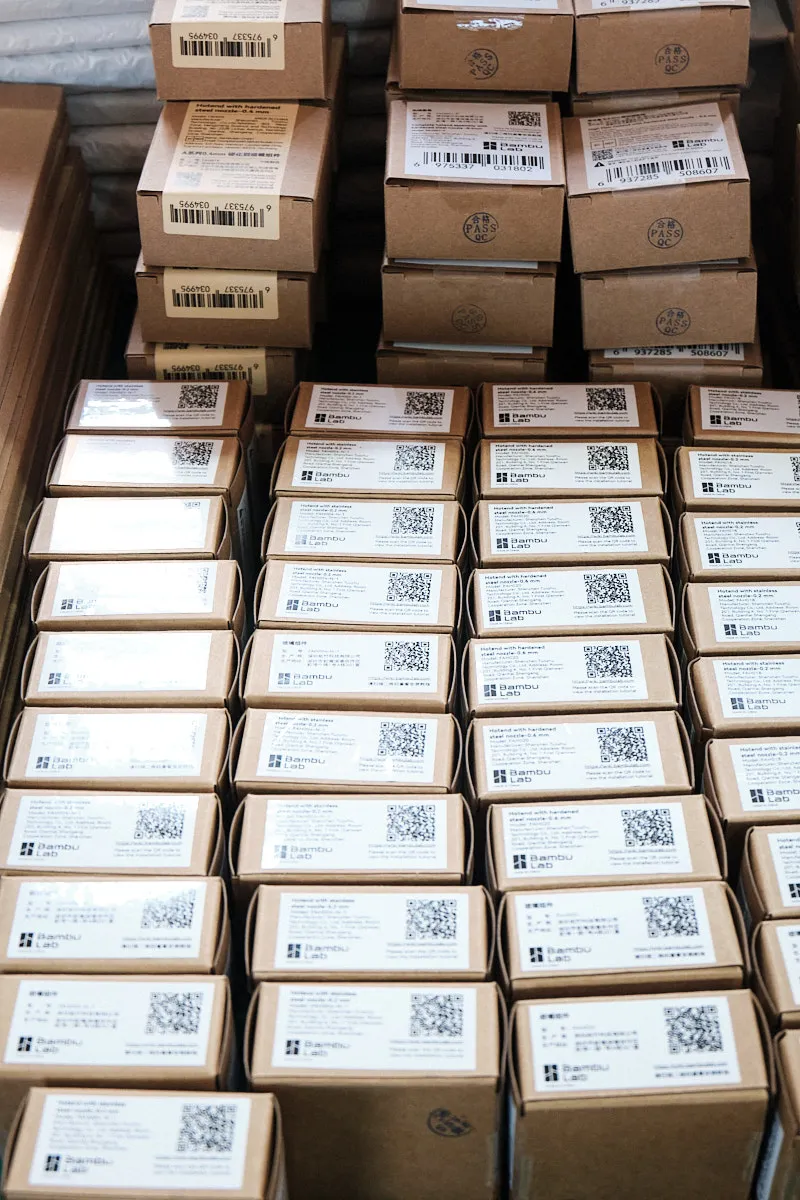
OEM & Wholesale Filament Services by VoxelFuse3D
Private label and OEM filament manufacturing
VoxelFuse3D provides OEM and private label filament manufacturing for brands and distributors.
Services include material selection, color formulation, diameter specification, packaging, and branding, with production managed under controlled manufacturing standards.
Wholesale supply of established filament brands
VoxelFuse3D provides OEM and private label filament manufacturing for brands and distributors.
Services include material selection, color formulation, diameter specification, packaging, and branding, with production managed under controlled manufacturing standards.
Professional sourcing with stable pricing and quality assurance
VoxelFuse3D provides OEM and private label filament manufacturing for brands and distributors.
Services include material selection, color formulation, diameter specification, packaging, and branding, with production managed under controlled manufacturing standards.